
Your Container Has Arrived: What to Check Before Your Electric Scooters Go to Customers
Delivery is not the end of the order — it is the last inspection. What to check on arrival, before a scooter reaches a customer.
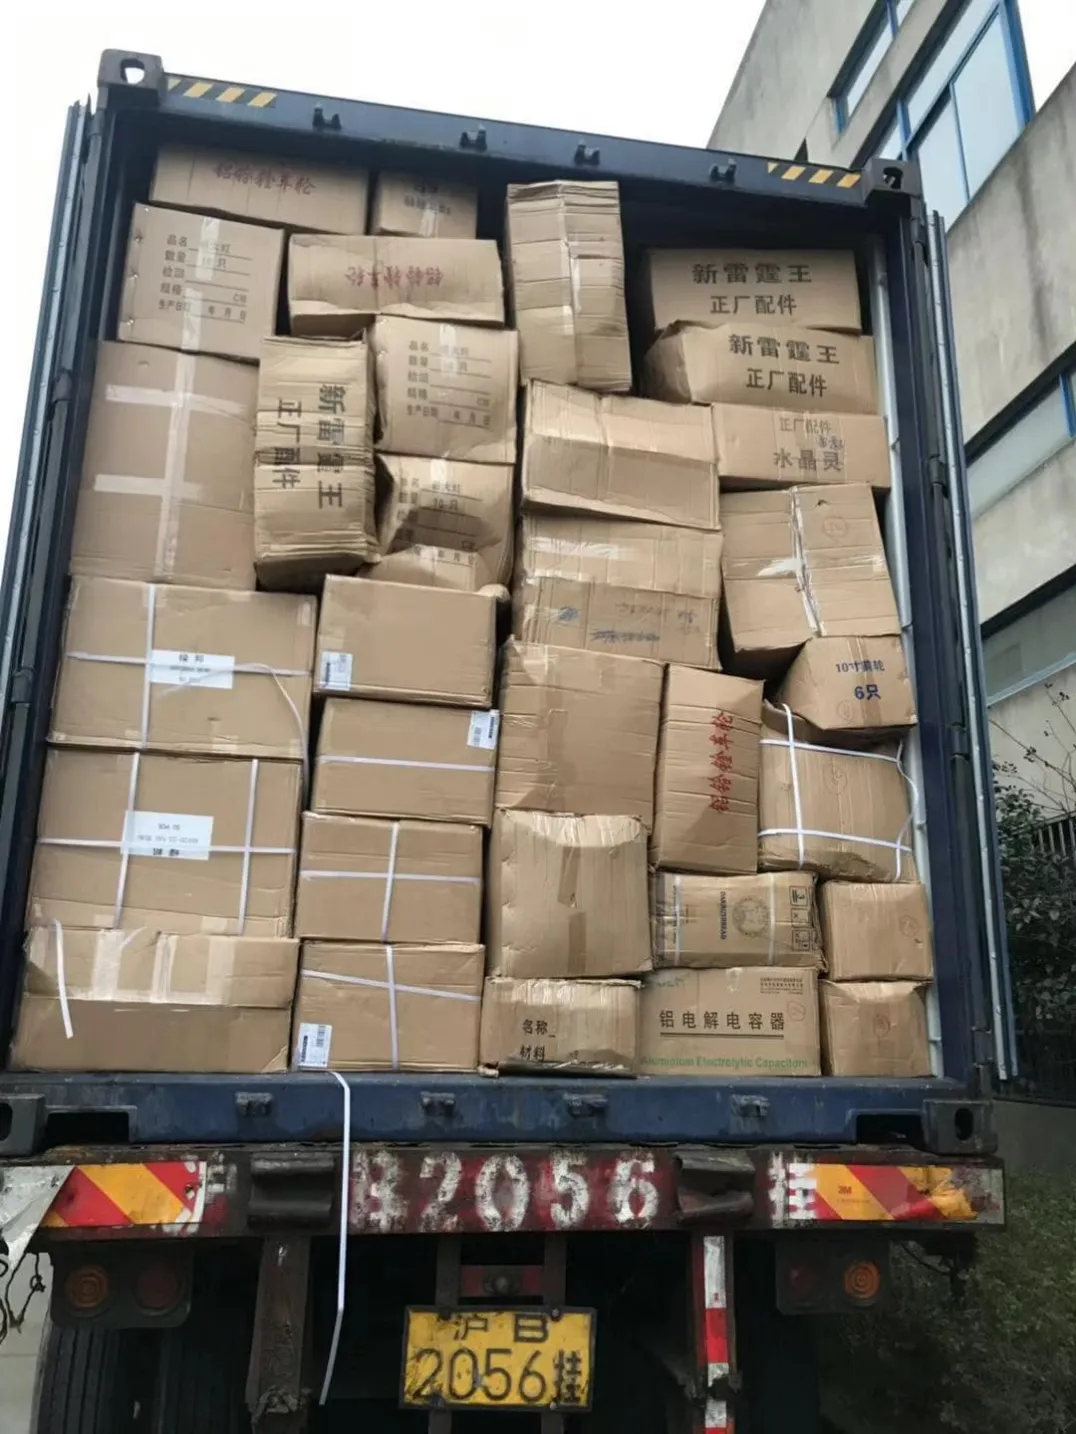
Delivery is not the end of the order
A container arriving at your warehouse feels like the job is done. It is not — it is the last inspection you get before a scooter reaches a customer, and the easiest moment to fix a problem. Once a scooter is sold and ridden, the same fault costs far more: a return, a repair, or a customer who never buys again.
Do this check before any vehicle leaves your warehouse, and keep a written record with photos for every unit.
That last point is worth planning for before the container arrives, not after it is already blocking your yard. Decide in advance who does the checking, where checked vehicles will stand, and where a vehicle that fails will stand so it cannot be sold by mistake. A simple arrangement works well: one marked area for vehicles still waiting to be checked, one for vehicles that have passed, and one clearly separate area for vehicles on hold. A length of tape on the floor and a tag on the handlebar will do. What matters is that no one in your shop has to guess a vehicle's status — the tag says it.
Prepare the paperwork before you start, too. Have your order confirmation, the final agreed specification, the packing list and any pre-shipment and loading photos the factory sent you printed or open on a screen next to the vehicles. The arrival check is a comparison: the goods in front of you against what was agreed in writing. Without the agreed version in your hand, the check becomes an opinion, and opinions are hard to send back to a factory as evidence.
A useful rule for the whole process: check in writing, not from memory. Give the person checking a simple form — paper is fine — with space for the vehicle's identifying label details, the battery label details, the checks below, a pass or fail for each, and notes. If two people are working together, one checks and one records and photographs. That is faster, and it means the record is made at the moment the fault is seen, not reconstructed at the end of a long day.
1. Count and match, before you unpack
- Count the cartons against the packing list. Note any short shipment or extra carton in writing, with photos, before unpacking.
- Match the paperwork to the goods. Invoice, packing list and certificate of origin should name the same model, battery and quantity as the cartons in front of you. If the paperwork names a different model or battery from the one on the cartons, stop and ask the factory before you unpack further.
- Check the container and carton condition. Note dents, water marks, broken strapping or opened cartons, and photograph them. Damage found on arrival is much harder to claim if it was never recorded.
Do this stage slowly, because it protects every later stage. Photograph the container before the doors are fully opened, then photograph the load as it first appears, before anything is moved. If cartons at the back are crushed or wet, that will only be visible at this moment — once the container is empty, you cannot prove how the goods arrived. If your delivery documents give you a place to note damage or shortage on receipt, write it there as well as on your own form, and do it before the driver leaves if your local procedure allows it. Confirm in writing, with the factory and with whoever handled your delivery, what the correct procedure is for noting damage on receipt in your market, because the exact form differs from place to place.
A worked example shows why the order of these steps matters. Suppose the packing list says one quantity and you count fewer cartons, but you only notice after half the cartons are already opened and the vehicles moved around your warehouse. At that point the factory can reasonably ask whether the missing cartons were miscounted, set aside somewhere, or opened earlier — and you cannot answer with certainty. If instead you counted first, photographed the full load, and recorded the shortage before unpacking, the conversation is short and factual. The same applies to an extra carton or a carton marked with a different model: record it as found, photograph the marking, and ask before you absorb it into your stock.
One more common mistake at this stage: unpacking everything at once to "save time." Unpack in batches you can actually finish checking the same day. Opened, half-checked vehicles scattered around a busy warehouse get knocked, lose small parts, and get mixed up — and a vehicle that has been moved three times before its check is a vehicle whose new scratch nobody can explain.
2. Check the vehicle against your order, unit by unit
- Model, colour and configuration — the label on the vehicle matches your order, not a similar model from the same line.
- Battery — voltage, capacity and chemistry on the label match your order, and the connector matches the specification sheet. On the Lubon LB-CS, the listed options are lithium / lead-acid, for example 60V/72V, 32Ah — confirm the exact battery on your order, and confirm the label on the vehicle is that battery.
- Charger — plug type and label visible, matching your market and your battery chemistry.
- Shipping form — fully assembled, SKD or CKD, as agreed in writing. On the Lubon LB-CS, the listed CKD lead time is 15 days — confirm the form and the lead time for your exact configuration and quantity before you place the order.
Work unit by unit, and finish one vehicle before you start the next. For each vehicle, the basic discipline is the same: read the label, compare it with the order, photograph the label, and record the result on that vehicle's line of your form. Battery labels deserve a photograph of their own. If a customer question or a battery problem arises months later, the photograph of the label as delivered is far stronger than a note saying "battery OK."
Pay particular attention to near-matches, because they are the errors that slip through. A similar model from the same line, a battery with the same physical size but a different voltage or capacity on the label, or a charger that fits the socket but is labelled for a different battery chemistry — each of these looks right at a glance and is wrong in use. This is why the check is label against order, not "does it look like the last shipment."
For the charger, do more than look at the plug. Read the whole label, confirm the plug type suits your market, and keep each charger with its vehicle until the vehicle is sold, so a charger is never paired with the wrong battery by accident in your warehouse. If your order arrived in SKD or CKD form, also check the kit contents against the agreed kit list as you unpack each unit: a missing small part discovered at assembly time, weeks later, is a much slower problem to solve than the same part reported on arrival day. Confirm in writing, before the order ships on your next purchase, exactly what each kit should contain.
Keep a short "confirm in writing" list from this stage for the factory. It should cover: any unit where the model, colour or configuration differs from the order; any battery whose label differs from the ordered voltage, capacity or chemistry; any charger whose plug or label does not match your market or battery; and any kit part missing or damaged. Send the list as one clear message with photographs, not as a series of separate complaints over several days — a single complete report is easier for a factory to act on, and easier for you to follow up.
3. Power it up and ride it, before it is sold
- Charge with the supplied charger and confirm the charging time is close to the stated figure — on the Lubon LB-CS the listed charging time is 4–6 hours; confirm it for your exact configuration.
- Test every light, indicator, horn, display and switch — including at night. Small electrical faults are the most common first complaint.
- Ride a sample from the batch on a normal road, with a normal load. Note whether power fades, brakes feel even, and anything rattles or pulls to one side. On the Lubon LB-CS, the listed figures are a 1500W motor and a listed top speed of 45 km/h — confirm the rated and peak power and the test conditions for your exact configuration, and test under your real load.
- Check the parts that wear first — brakes, tyres, lights and switches — and confirm the wear parts on the delivered vehicles are the same parts the factory will supply for after-sales.
The electrical check is quick if you do it in a fixed order, the same order every time: display on, lights, indicators on both sides, horn, brake light when each brake is applied, and every switch the rider will touch. Doing it in a fixed order is what stops one item being skipped on a busy day. Testing in the dark, or at least in a shaded corner, matters because a weak light or a dim display can look acceptable in bright daylight and fail the customer's first evening ride.
On charging, record what you actually observe: when charging started, which charger and vehicle were used, and when the charger indicated a full charge. You are not running a laboratory test — you are confirming that the delivered vehicle, with its supplied charger, charges in a time close to the stated figure for your configuration. If one vehicle charges very differently from the rest of the batch, set it aside in the hold area and report it individually rather than averaging it away. A single outlier unit is exactly the unit this check exists to catch.
On the test ride, decide in advance how much of the batch you will ride. Riding every unit briefly is ideal where time allows; if the batch is large, ride a sample from the batch — but choose the sample deliberately, for example vehicles from different parts of the load and different cartons, not just the first two off the container. Ride on a normal road, with a normal load, the way your customers will ride. Note whether power fades, whether the brakes feel even, whether anything rattles, and whether the vehicle pulls to one side. Write the notes down straight after the ride, while the feel of the vehicle is still fresh, and attach them to that vehicle's record.
A common mistake here is treating a passed ride as the end of the check for the whole batch. It is not. The ride checks how the model performs; the unit-by-unit label and electrical checks are what catch the individual wrong battery, wrong charger or dead switch. You need both. Equally, do not let a vehicle that failed any part of this section be "quickly fixed and sold" without the fix being recorded — if the same fault appears for the customer later, you will want to know it was present on arrival.
Finally, compare the wear parts in front of you with the factory's spare-parts list while the vehicles are still in front of you. Brakes, tyres, lights and switches are the parts that wear first, and the time to confirm that the factory supplies the same parts for after-sales is arrival day, not the day a customer's scooter is standing in your workshop waiting for a part.
4. Record it, and tell the factory in writing
Write down what passed, what failed, and what must change — with photos — and send it to the factory while the shipment is still fresh. Keep the arrival photos with your order file, next to the pre-shipment and loading photos. If a problem appears later, that file is your evidence.
Make the report easy to act on. A good arrival report has four parts: what was ordered, what arrived, what was checked, and what you are asking the factory to do. List each problem vehicle separately, with its label details and its photograph, and state clearly for each one whether you are asking for a replacement part, a corrected document, or an explanation. Vague reports get vague replies; a factory that receives a precise, photographed, unit-by-unit report can check its own records and answer precisely.
Timing matters as much as content. Send the report while the shipment is still fresh — the same day if you can, and while your own team still remembers the unloading clearly. Every day of delay weakens the connection between your photographs and the delivery, and delays the parts or documents you need. Keep the complete file together: order confirmation, agreed specification, pre-shipment photos, loading photos, arrival photos, your check forms and the report you sent. Stored together, that file settles most later questions in minutes. Scattered across phones and message threads, the same evidence is nearly useless.
Use the report for your next order, too. The faults and near-matches you found on arrival are the exact points to confirm in writing before the next container: the battery label to be photographed before packing, the charger label and plug to be confirmed, the kit list to be agreed, the documents to be checked against the model before dispatch. Each arrival check should make the next order's specification tighter. And where warranty questions arise from anything you found, do not rely on what was said in conversation — confirm the warranty terms in writing with the factory, for your exact model and order, so both sides are working from the same document.
A scooter that fails honestly in your warehouse is a success: it just saved you a customer complaint.
Ordering electric two-wheelers? Tell us your model, battery and shipping form, and we will confirm the sample terms, documents and loading photos for your order in writing before the container is sealed. Email: saravehicle@jxlubon.com · WhatsApp: +86 189 7035 3905